
If you have ever caught a whiff of a persistent, musty smell in your basement or noticed an unsightly dark patch under your bathroom sink, you know the immediate surge of worry that follows. Is that mold? Is it dangerous? Do I need to tear out the drywall or spend thousands on an inspector right this second?
Over my 30 years as an editorial writer covering home care and consumer guidance, I’ve seen homeowners repeatedly fall into two frustrating traps when faced with potential mold: panic-buying expensive, full-scale inspector visits before getting basic facts, or buying cheap hardware store “petri dish” culture plates that grow mold from everyday room air and tell you practically nothing.
There is a much calmer, smarter middle ground: DIY surface swab sampling backed by accredited laboratory microbiology.
At Total Testing, our motto is simple: Test Before You Guess. But how exactly does an at-home mold test kit work behind the scenes? In this guide, we’ll demystify the step-by-step mechanics—from the moment you swab a suspicious spot in your living room to the science that happens inside the lab.
By the Total Testing Editorial Team
Key Takeaways: How DIY Surface Mold Testing Works
- Targeted Swab Sampling: Instead of relying on open-air culture dishes, high-quality kits use sterile surface swabs to collect physical samples from specific 2×2 inch patches.
- No Waiting for a Box: You don’t have to wait days for a kit to arrive in the mail before taking action. Once you select your package online, your Chain of Custody (COC) document and unique prepaid shipping label are generated digitally.
- Accredited Microbiology: Samples are analyzed under microscopic inspection in an independent, accredited laboratory—identifying exact mold species and spore density rather than leaving you to guess at home.
- Rapid Turnaround: Digital reports are delivered directly to your secure dashboard in 24 to 48 business hours after the lab receives your package.
- First-Step Screening Tool: At-home sampling gives you lab-verified clarity so you can decide whether you can clean the spot yourself or need to consult a licensed professional remediator.
The Core Science: Why Surface Swabs Outperform “Petri Dish” Tests
Before walking through the physical steps, it helps to understand why modern mold testing relies on surface swab sampling rather than open-air culture dishes.
The Ambient Air Problem: According to the U.S. Environmental Protection Agency (EPA) and the Centers for Disease Control and Prevention (CDC), microscopic mold spores exist naturally in all indoor and outdoor air. If you set a gravity petri dish on a table, airborne spores will land on the nutrient agar and grow fuzzy colonies within a few days. This creates a false alarm, making perfectly normal air look like a toxic infestation.
An at-home surface swab kit solves this by focusing strictly on settled surface growth. By physically wiping a suspected patch—such as a stained baseboard, a discolored window frame, or an air vent louver—you collect the actual fungal structures growing on that specific material.
Step-by-Step: How an At-Home Mold Test Kit Works
Here is the exact journey your sample takes, from initial discovery to final lab report.
Step 1: Package Selection
Every home is different. You begin by selecting the number of surface locations you need to test based on your home’s layout:
- Spot Check (2 Samples): Ideal for isolating 1 or 2 specific problem areas (e.g., under the kitchen sink and behind the toilet).
- Extended (4 Samples): Our most popular option for covering key concern areas across a standard single-family home.
- Full House (6 Samples): Best for broad coverage across multiple rooms, basements, or HVAC vents, featuring expedited 24-business-hour lab processing.
Step 2: Digital Setup & Shipping Materials
Upon checkout, you don’t need to wait for a physical box to arrive before organizing your test. Your purchase immediately generates a unique Chain of Custody (COC) document and a prepaid FedEx return shipping label sent directly to your email and accessible inside your secure portal at total-testing-diy.com.
Note: Each new test purchase generates its own unique prepaid label—ensuring your package is tracked and linked directly to your digital account.
Step 3: Collecting the Surface Swab Sample
Collecting a swab sample is clean, quick, and takes less than two minutes per location:
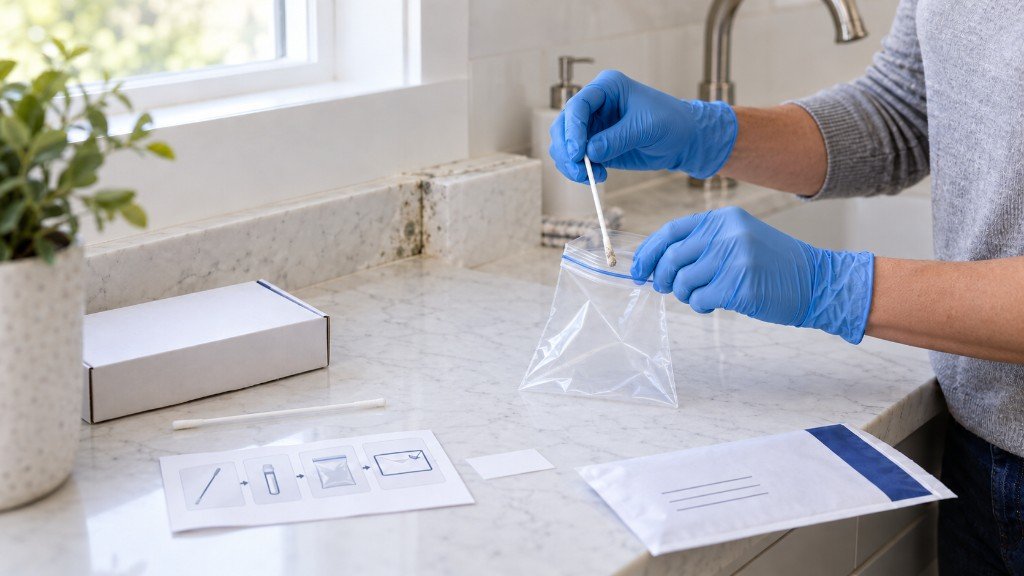
- Prepare Your Bags: Take clean household plastic Ziploc-style bags and label each one clearly with a permanent marker (e.g., “Sample #1: Master Bathroom Sink”).
- Wear Protective Gear: Put on disposable gloves to protect yourself and prevent cross-contamination.
- Swab the Area: Using a clean swab (such as a sterile cotton swab or Q-tip), gently rub and roll the tip across a roughly 2×2 inch area of the suspected mold growth.
- Seal the Sample: Place the swab into its designated labeled bag and seal it tightly. Repeat with a fresh swab for each additional location.
- Document the COC: Fill out your Chain of Custody form, recording the exact room, surface material (e.g., drywall, wood trim, tile grout), and any observed moisture conditions.
Step 4: Express Shipping to the Laboratory
Place your sealed sample bags and signed Chain of Custody document inside a sturdy mailing envelope or box, apply the prepaid FedEx shipping label, and drop it off at any official FedEx location or drop box. There are no surprise shipping fees or hidden return costs.
Step 5: Accredited Laboratory Analysis
Once your package arrives at the lab, you receive an automated “Samples Received” notification. Professional microbiologists prepare your swabs for direct microscopic examination (tape-lift / direct swab prep):
- Species Identification: The microbiologist identifies specific mold genera present (such as Cladosporium, Penicillium, Aspergillus, Alternaria, or Stachybotrys chartarum).
- Quantification & Density: The lab measures spore density and background debris to determine whether active, elevated growth is present on that surface.
- Toxicity Context: The lab frames the findings based on known health allergen categories without making alarmist medical diagnoses.
Step 6: Receiving Your Digital Action Plan
Within 24 to 48 business hours after the lab receives your samples (depending on your chosen package), your official Mold Surface Testing Report is published directly to your secure account at total-testing-diy.com.
Comparing Total Testing Packages
All Total Testing options include accredited laboratory analysis, Chain of Custody tracking, prepaid return shipping, and clear digital reports. They differ primarily in the number of samples and lab turnaround speed:
| Package Name | Included Samples | Price (One-Time) | Lab Turnaround Time* | Recommended Use Case |
|---|---|---|---|---|
| Spot Check | 2 Samples | $189 | 48 Business Hours | Quick check for 1–2 suspicious surface spots |
| Extended | 4 Samples | $215 | 48 Business Hours | Most popular choice for key areas in standard homes |
| Full House | 6 Samples | $270 | 24 Business Hours | Broader coverage + fastest priority lab turnaround |
*Turnaround time begins when the laboratory physically receives your samples, not at the time of online purchase.
What Does Your Lab Report Tell You? (And Next Steps)
Your finished Mold Surface Testing Report provides plain-English answers to three fundamental questions:
- What is growing on the surface? A clear breakdown of identified mold species.
- How much is there? Spore concentration levels indicating whether growth is normal background or elevated contamination.
- What should I do next? Practical, non-alarmist next steps.
Moisture Control: The EPA & CDC Blueprint
If your report confirms elevated mold growth, the most critical next step is controlling moisture. As both the US EPA and CDC emphasize: Moisture control is the key to mold control.
- Fix Water Leaks Promptly: Repair plumbing leaks, roof drips, or window condensation immediately.
- Rapid Drying: Dry any water-damaged materials within 24 to 48 hours to prevent new mold spores from germinating.
- Maintain Relative Humidity: Keep indoor humidity below 60%—ideally between 30% and 50%—using exhaust fans, air conditioners, or dehumidifiers.
- Do not clean visible growth yourself: Do not scrape, bleach, or wipe visible mold yourself. Disturbing growth can release spores into the air. Share your lab report with a qualified mold remediation professional.
Important Product Limitations & Official Disclaimer
To maintain total transparency and adhere to professional industry standards, every homeowner should understand what a DIY surface test kit can and cannot do:
Official Disclaimer & Screening Notice
The Total Testing DIY Mold Test Kit is intended solely as a preliminary screening tool to help identify the possible presence of mold on sampled surfaces. It provides an initial understanding of potential mold contamination and should not be considered a substitute for a comprehensive mold assessment by a licensed mold professional.
DIY surface testing is not a full indoor air quality study, does not measure airborne mold throughout an entire building, and cannot detect concealed mold hidden inside unopened walls, ceilings, flooring, or HVAC duct cavities without physical access. Findings apply strictly to the specific surfaces sampled at the time of collection.
If your lab results show significantly elevated mold growth, or if you are dealing with widespread visible mold, major unaddressed water damage, persistent musty odors, or health concerns, Total Testing strongly recommends consulting a licensed mold assessment professional or certified remediator per applicable local regulations.
Frequently Asked Questions (FAQ)
Q1: Can an at-home mold test tell me if my air is safe?
No. DIY surface swab testing specifically analyzes settled growth on physical surfaces you can touch and swab. It is not an indoor air quality study. However, swabbing visible spots or HVAC vent louvers provides critical preliminary clues about what may be circulating in your space.
Q2: Do I need an inspector to walk through my home first?
Not necessarily. Many homeowners prefer DIY surface testing as a private, convenient, and cost-effective first step. It gives you lab-verified facts before you decide whether to hire an inspector or remediation contractor.
Q3: How fast will I get my results?
Once your samples reach our accredited laboratory via FedEx, your report is processed and uploaded to total-testing-diy.com in 48 business hours for Spot Check and Extended packages, or 24 business hours for the Full House package.
Q4: Are there any hidden shipping fees?
No. Every Total Testing package includes a prepaid FedEx return shipping label with tracking—there are no extra shipping fees when sending your samples to the lab.
Ready to Get Clear Answers for Your Home?
Don’t let unexplained odors or discolored patches cause unnecessary stress. Take control of your home’s indoor environment with lab-backed clarity.
- Looking to test suspicious spots today?
Explore our testing packages and order online at total-testing.com. - Already sent in your samples?
Log in to view your reports and Chain of Custody documents at total-testing-diy.com. - Have questions?
Reach out to our customer support team anytime at info@total-testing.com.