
Quick Executive Summary
Finding a damp spot under the bathroom cabinet or noticing a musty odor in the basement can trigger instant worry. Many homeowners reach for quick solutions, but improper DIY testing can lead to inaccurate results, wasted money, and unneeded stress.
By avoiding seven common pitfalls, you can get clear, accredited laboratory facts without paying for unnecessary professional inspections.
Core Takeaways:
- Avoid open-air petri dishes that trap harmless ambient spores and trigger false alarms.
- Always collect direct surface swab samples across a 2×2 inch patch using proper sterile technique.
- Complete the PDF Chain of Custody (COC) document provided with your purchased package to accompany your samples.
- Ship samples immediately using prepaid FedEx express return labels for fast 24 to 48 business hour lab turnaround after receipt.
- Address relative indoor humidity (30% to 50%) and fix water leaks within 24 to 48 hours per EPA and CDC guidelines.
At Total Testing, our core mission is centered on a simple principle: Test Before You Guess. Here are the seven most common DIY mold-testing mistakes homeowners make, along with practical tips to avoid them.
By the Total Testing Editorial Team
Mistake 1: Relying on Open-Air Petri Dishes (Culture Plates)
One of the most frequent mistakes is buying over-the-counter culture plates at a local store. These kits require you to leave a petri dish open in a room for several hours to catch airborne spores.
Why this creates confusion: Mold spores are a natural component of outdoor and indoor air everywhere. An open-air dish collects harmless ambient spores that naturally float through open windows or HVAC vents. After a few days, mold grows on the agar dish regardless of whether your home has a real mold problem.
The Smarter Approach: Instead of testing general air with open culture plates, perform targeted surface swab sampling. Swabbing a specific discolored patch or damp surface gives certified microbiologists a direct sample to analyze under microscopic examination.
Mistake 2: Swabbing the Wrong Area or Using Poor Sampling Technique
Collecting a surface sample seems simple, but small errors in technique can impact lab clarity.
Common sampling errors include:
- Swabbing dry, dust-covered surfaces that have no signs of moisture or growth.
- Touching the sterile swab head with bare fingers before sampling.
- Scrubbing so aggressively that the swab stem breaks or tears the surface material.
How to collect samples correctly:
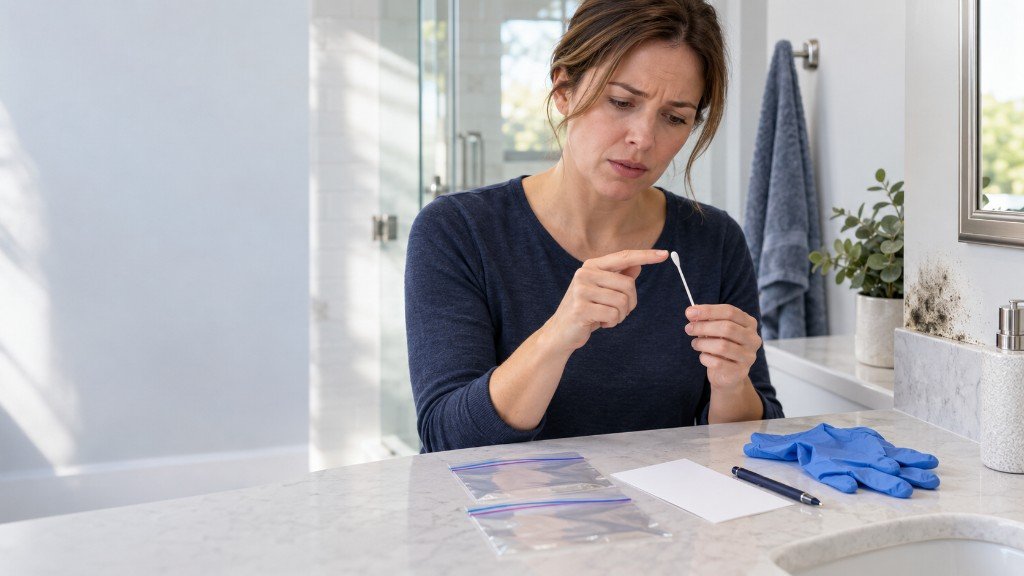
- Identify a 2×2 inch patch with visible staining, discoloration, or dampness.
- Remove the sterile swab from its protective packaging without touching the cotton tip.
- Hold the stem firmly and gently roll the swab head across the 2×2 inch area with light, even pressure.
- Place the swab into the provided collection tube or clean sealable bag, labeling the location clearly.
Mistake 3: Forgetting or Improperly Filling Out the PDF Chain of Custody (COC)
Every sample sent to an accredited environmental microbiology laboratory requires formal tracking. This documentation, known as the Chain of Custody (COC), links your physical sample to your package record and account.
Total Testing provides a PDF Chain of Custody (COC) form tailored to your purchased package. Skipping or improperly completing this form means the laboratory receives an unidentified sample, delaying processing while lab technicians match the shipment to your order.
How to keep your testing on track: Before sealing your shipping box, fill out the PDF Chain of Custody form provided with your package. Record the exact room name (such as “Master Bath Cabinet” or “Basement East Wall”) for each sample number. Place the completed PDF form directly inside the box with your samples. This ensures smooth, error-free processing the moment your box arrives at the lab.
Mistake 4: Holding Onto Samples Instead of Shipping Immediately
After swabbing a surface, some homeowners leave the sample sitting on a counter or desk for several days before dropping it off for shipping.
While surface swabs are resilient, prompt delivery ensures the laboratory receives the sample in optimal condition for microscopic evaluation.
Best Practices for Shipping: Total Testing packages include a prepaid FedEx express return shipping label. As soon as you finish swabbing and filling out your PDF Chain of Custody (COC) form:
- Place your labeled samples and completed PDF COC form into the shipping box.
- Insert the box into the prepaid FedEx express return mailer.
- Drop the package off at any official FedEx location or authorized drop box.
- Track your package online using your provided tracking number.
Fast express shipping allows certified microbiologists to begin testing immediately, returning your lab report within 24 to 48 business hours after lab receipt.
Mistake 5: Expecting DIY Surface Sampling to Replace a Structural Assessment
DIY mold testing is a powerful preliminary screening tool, but it is important to understand its proper scope.
Surface swab testing is designed to confirm whether a visible spot, stain, or damp patch contains active mold growth and identify the specific mold species present. However, DIY surface swabs cannot inspect deep structural cavities behind drywall, evaluate entire HVAC duct networks, or replace a full-building engineering assessment.
Knowing the limits of preliminary screening:
- Use DIY surface sampling when you see a suspicious spot, smell a localized musty odor, or want to verify a surface after a minor spill.
- Consider a licensed professional inspection if your home has suffered severe flooding, major structural water damage, or requires formal documentation for real estate or legal proceedings.
Mistake 6: Treating the Mold Without Fixing the Moisture Source
Testing and cleaning visible mold without correcting the underlying moisture issue guarantees that mold will return.
According to guidance from the U.S. Environmental Protection Agency (EPA) and the Centers for Disease Control and Prevention (CDC), mold requires moisture to grow. Without water, mold spores remain dormant.
Key Moisture Control Guidelines:
- Maintain indoor relative humidity levels between 30% and 50% using dehumidifiers, air conditioning, and proper exhaust ventilation in kitchens and bathrooms.
- Clean and dry any water leaks, plumbing drips, or spills within 24 to 48 hours to prevent mold growth from taking root.
- Do not scrape, bleach, or wipe visible mold yourself. Disturbing growth can release spores into the air. Share your lab report with a qualified mold remediation professional.
Mistake 7: Panicking and Overpaying Before Getting Lab Facts
When homeowners spot dark discolored patches, panic can lead to impulse decisions. Booking an emergency professional inspection or hiring an expensive remediation crew without knowing what species is present often leads to overspending.
Not all dark spots are harmful mold, and not all moisture stains require costly structural tear-outs.
Why testing first saves money: Starting with a transparent DIY surface sampling package allows you to get clear, accredited laboratory answers for a fraction of the cost of an on-site inspector.
Total Testing Package & Cost Overview
- Spot Check ($189): Includes 2 surface swab samples, prepaid FedEx express return shipping, package-specific PDF Chain of Custody (COC), accredited laboratory microbiology analysis, and 48 business hour lab turnaround after receipt.
- Extended ($215): Includes 4 surface swab samples for multi-room coverage, prepaid FedEx express shipping, package-specific PDF Chain of Custody (COC), accredited lab analysis, and 48 business hour lab turnaround after receipt.
- Full House ($270): Includes 6 surface swab samples for complete home coverage, prepaid FedEx express shipping, package-specific PDF Chain of Custody (COC), accredited lab analysis, and priority 24 business hour lab turnaround after receipt.
By getting verified laboratory data first, you can make informed, calm decisions about next steps.
Comparison: Common DIY Mold Testing Approaches
Here is how different DIY testing methods compare in clarity, turnaround time, and reliability:
| Feature | Open-Air Culture Plates | Over-the-Counter Mail Kits | Total Testing DIY Surface Swabs |
|---|---|---|---|
| Sampling Method | Open agar dish left in room air | Variable surface or air collection | Targeted sterile surface swab (2×2 inch patch) |
| Lab Analysis Included | No (requires extra mail-in fees) | Often extra mail-in fee ($40 to $60 per sample) | Yes, accredited laboratory microbiology included |
| Shipping Included | No prepaid shipping | Standard slow mail (no express tracking) | Prepaid FedEx express return shipping included |
| Sample Tracking | Manual paper slips | Varies by brand | Package-specific PDF Chain of Custody (COC) form |
| Turnaround Time | 7 to 10 days waiting for growth | 1 to 2 weeks after mail arrival | 24 to 48 business hours after lab receipt |
| Reliability | Low (captures natural ambient spores) | Medium (depends on sample quality) | High (direct microscopic identification of surface mold) |
Note: The table above illustrates general industry differences. Total Testing packages include all lab analysis fees, prepaid express shipping, and digital reporting with no hidden charges.
Official Product Screening Disclaimer
Total Testing DIY mold test packages provide preliminary surface screening through accredited laboratory microbiology analysis. DIY surface swab sampling is designed to identify mold species on accessible surfaces and is not a substitute for a comprehensive professional engineering evaluation, structural building inspection, or indoor air quality study.
Frequently Asked Questions About DIY Mold Testing
What if I accidentally touch the swab tip before sampling?
If the sterile swab tip touches your fingers, clothing, or a clean surface before sampling, use a fresh sterile swab from your package to ensure your sample remains free from external contamination.
Can I test mold behind a wall with a surface swab?
Surface swabs are designed for accessible exterior surfaces. If you suspect hidden mold inside a wall cavity without any visible surface staining or access point, a licensed mold inspector equipped with cavity probes or thermal cameras may be required.
How do I access my lab results once testing is complete?
Once the accredited laboratory finishes analyzing your samples, your digital lab report will be uploaded directly to your secure portal at total-testing-diy.com. You will receive an email notification as soon as your report is ready to view.
What should I do if my lab report confirms mold on a surface?
Stop active leaks if you can do so without disturbing the growth, keep indoor humidity in a typical range, and share the lab report with a qualified mold remediation professional. Do not scrape, bleach, or wipe the growth yourself.
Take Control of Your Indoor Air Quality Today
Avoid the stress of guesswork and unneeded inspection fees. With Total Testing, you get transparent pricing, accredited laboratory microbiology, prepaid FedEx express return shipping, package-tailored PDF Chain of Custody forms, and clear digital reports delivered in 24 to 48 business hours after lab receipt.
Remember: Test Before You Guess.
To select the right testing package for your home, visit total-testing.com today. If you already have your package and are ready to view your lab reports, log into your portal at total-testing-diy.com.